This article details the steps for building an outdoor, fixed-position, pull-up bar that will outlive your grandchildren. You also have the option to build a set of parallel bars to create the ultimate bodyweight strength training setup.
Equipment doesn't come much more basic than bodyweight bars, but you can build incredible strength and definition with many different exercises that will challenge you for years to come with this setup.
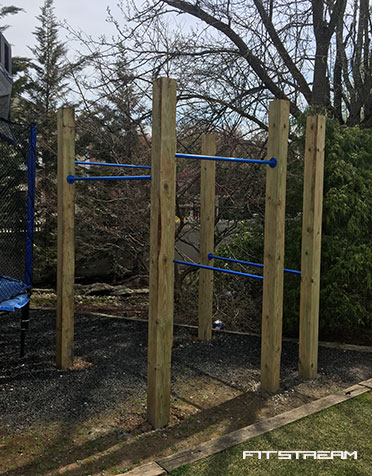
This is what we're building...
Pull-up Bar Requirements
Our requirements for the pull-up bar project are -
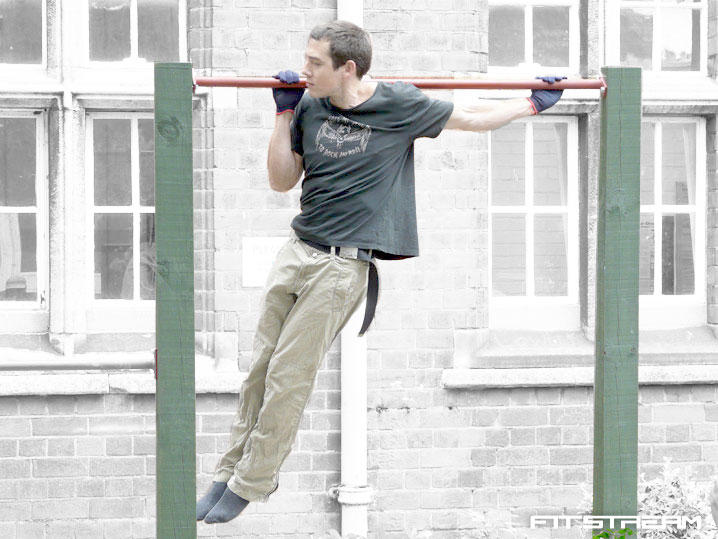
- Appropriate size and with space to exercise effectively - to allow a variety of common exercises without compromising on form or technique (such as pull-ups, dips, muscle-ups, leg raises, and various freestyle street workout movements).
- Heavy duty - strong and sturdy enough for at least one person to train safely and with intensity.
- Weatherproof - suitable for outdoor use and will stand the test of time.
The sturdy design and outside setting of this bodyweight gym will give you the perfect venue for some freestyle bar work and more than enough room for muscle-ups, bar handstands or hanging gymnastics rings.
Tools and Materials Needed
Here are the materials you'll need to build one pull-up bar -
- 2 x 5x5 inch posts, 10-11 ft (depending on your height)
- The bar - (There are two options here, see "Bar Welds" below for more information)
- Option 1: 33 mm thick steel tube with welded brackets, made to measure
- Option 2: 33 mm steel tube and 2 x mounting cups
- 4 x 4 inch self-tapping bolts and washers (10mm thick)
- 2 x bag of quick dry Postcrete
- Estimated 6 - 10 bags of ready-mixed concrete (or you can mix it yourself)
- A small bag of gravel
- Fence paint to protect the wooden posts
- Red Oxide paint (tin or spray can) to prevent the bar from rusting.
...and the tools required -
- Spade
- Thick paint brush
- Spirit level
- Long rod or broom handle
- Tape measure
- Wheelbarrow or bin to mix concrete
- Drill with 9 mm and 10 mm drill bit
- Adjustable spanner
- An extra pair of hands!
Building the Pull-up Bar
Learn how to make a fixed position, outdoor pull-up bar using the instructions below. This will provide you with one seriously sturdy pull-up bar which will support your bodyweight training for years to come -
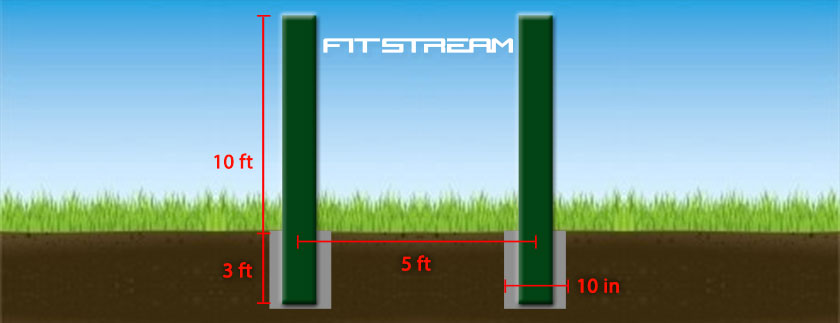
- Mark on the ground (5 ft apart) where you want the posts for your pull-up bar.
- Dig square holes 10 inch x 10 inch ensuring that the marks you made in the ground are in the middle of the holes. These holes should be about 3 ft deep for 10 ft posts or 3-4 ft deep for 11 ft posts.
- Use around 2-3 inches of gravel in the holes to help water drainage and prevent the wood rotting. More or less gravel should be added to make the post heights the same.
- Paint the posts with fence paint or wood preserver.
- Put posts in hole and get a couple of people to hold them. Make sure they are:
- In line with each other
- The same height
- Flat edges on both posts are parallel
- Straight (use a level)
- Pour one bag of dry Postcrete in each hole around posts and re-check the levels.
- (Following instructions) Add correct amount of water to the Postcrete. Poke the mix with a broom handle or a rod to mix the water into the powder. Make sure you keep the posts Level and Aligned while Postcrete dries, usually around 3-5 mins drying time.
- Mix concrete (following instructions on bag), fill hole and level off. (1-2 days setting time)
- Fix the bar
- Measure the exact distance in millimeters between the tops of the posts (where you want the bar). Get the Bar made at a local steel merchant / retailer / fabricator using the measurements. See "Bar Welds" section below for more information.
- Clean and paint the bar with red oxide.
- Hold the bar where you want it ensuring it's level and mark holes for the drill points. Remove the bar and drill the marks 3 1/2 inch - 4 inch (same length as thread on the bolts. Use a 9 mm drill bit even though it's a 10 mm bolt).
- Wind-in bolts and washers with spanner to fix bar in place and finish the pull-up station!
 Bar Mounting
You essentially have two options - a welded bar mount, or DIY bar and cup mount.
It's far more preferable to have your pull-up bar made to measure and welded by a local steel fabrication company. The image to the right is an example of a welder bar mount. The spec of this bar is;
- 33 mm thick steel tube with 100 mm x 40 mm welded brackets on each end (2 x 10 mm holes on each bracket).
- The tube should be around 1.4 metres long including brackets, but measure this after the posts are installed!
Building Parallel Bars
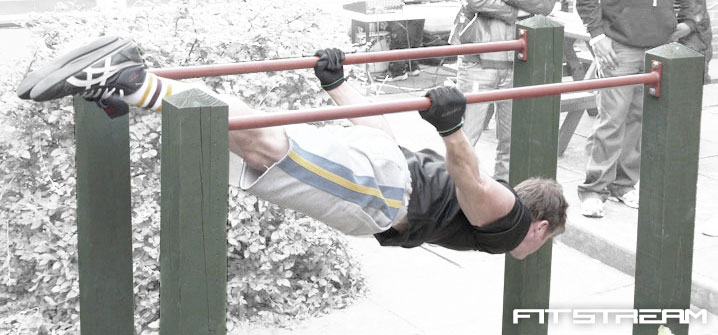
Parallel bars are another great addition to your outdoor bodyweight gym that you can build yourself.
The parallels can be used mostly for dipping exercises, which is another stable bodyweight exercise everyone should consider adding to their routine. These bars also allow you to practice making the fluid transition from one bar to another which is a solid demonstration in strength and agility skills.
To build parallel bars you simply use the same process as above but using shorter posts (the parallel bars pictured below are 5ft high above ground, with 2.5 ft below ground) and two sets of bars are installed in parallel, around shoulder width apart.
You must make sure that the bars are fixed at the same height using a spirit level.
Building Combined Pull-up and Dip Bars
If you're short on space and looking for both pull-up and dip bars, rather than building two separate pieces of equipment you should consider a combo design like this -
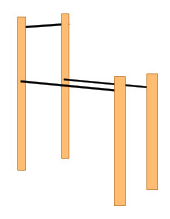
Joining the chin-up and dip bars together as one unit will reduce the number of posts and concrete which will also save you installation time and money.
Bar Training
The training possibilities are almost limitless with these fitness bars. Start with some of the basic bodyweight movements and as you get more advanced you can begin to string together exercises for some freestyle bar work.
Forget what you know about strength training until you've tried bodyweight bar training. It's simply unparalleled for building raw strength and a lean, chiselled physique.
Beginners Bar Training
Some of the basic moves you should start with include;
Advanced Bar Training
If you've mastered the basics and looking for some extra challenges you can try rigging gymnastics rings to the bar to increase the difficulty of exercises by introducing the instability of the free-moving rings.
You can also raise the intensity of your training incrementally using an adjustable weighted vest which builds serious strength and sees fast progress in your fitness levels.
Check out Fitstream Athletes Lee Wade Turner and Jay 'KillinGravity' in the video below showing just what you can do on the bars with a bit of dedication -
Other Approaches to Building your Pull-up Bar
Check out this alternative approach to building your own outdoor pull-up bar sent to us by FitnessFAQs:
Pull-up Bar Specifications
- 2.03 solid stainless steel bar (34-35mm)
- 2 x 3.7M (100mm x 100mm x 4mm) Galvanised posts
- 2 Galvanised Post caps
- 0.6m3 concrete mix (25MPA X 14mm Stones)
Hole Dimensions
- 500mm x 500mm x 1.2m deep
- Distance between posts (inside) 1.7m
- Distance from ground to bar is 2.5m (Plenty of room for legs to hang even if >6" tall)
Example Outdoor Pull-up Bars
Thank you to Mary McMurtrey for sending us her set-up -
"Just wanted to tell you guys thanks for posting about how to put in an outdoor pullup bar. It took me over a year since first seeing the post, but I finally had the space, time, and money to put one in (along with a set of dip bars) and it came out great. I ended up using 4x4 posts 11ft long sunk 3ft for the pullup bar and 8ft posts sunk 3ft for the dip bars. The bars are a bit smaller than your instructions (1 inch instead of 1 1/4 because I have smaller hands) but they are solid. Including a picture so you can see how I put it all together. I'm pretty new to the calisthenics/street workout scene so I'm looking forward to seeing what I can do over time with my new piece of equipment."
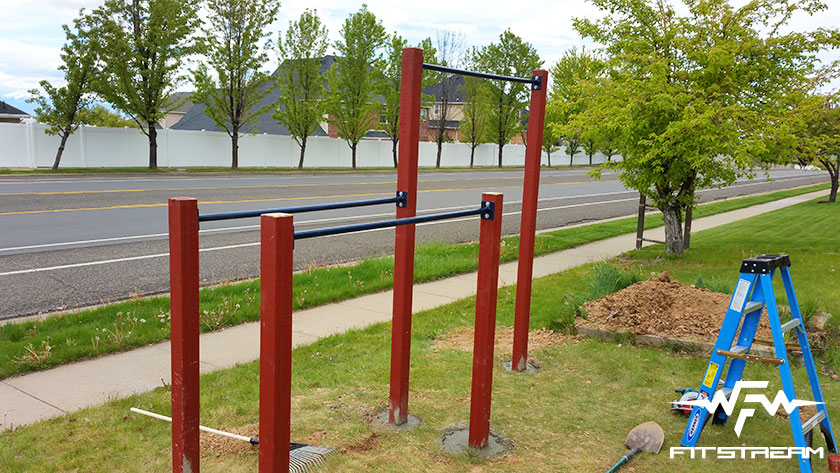
Garcia Simpson also shared the results of his DIY Pull-up and Dip Station project -
"I used -
- (2) 4x4x10ft posts
- (3) 4x4x8ft posts
- (1) 1 1/4 inch galvanized pipe 5ft long
- (2) 1 1/4 in galvanized pipe 54 inches long
Posts are pressure treated and i coated them with Thompsons stain/water seal then painted brown. Bars are held in place by drilling a 1 1/4 inch hole through post and capped of by painted PVC caps.The exposed thread was covered by plumbers tape to prevent rusting from rain and condensation. I also drilled a 3/8 inch hole through the posts and through the pipe and installed (4) 3/8 x4in long galvanized carriage bolts with washer and nut to prevent the bar from spinning.
Height of pull up bar is 7ft with 3ft below ground and dip bars are 5ft tall with 3ft below ground. I added a 2x4 between the dip post and pull up bar post to act as a step for my son. All in all this was a pretty cool and fun project and what's satisfying is that I did it all by myself." Thanks for sharing Garcia!
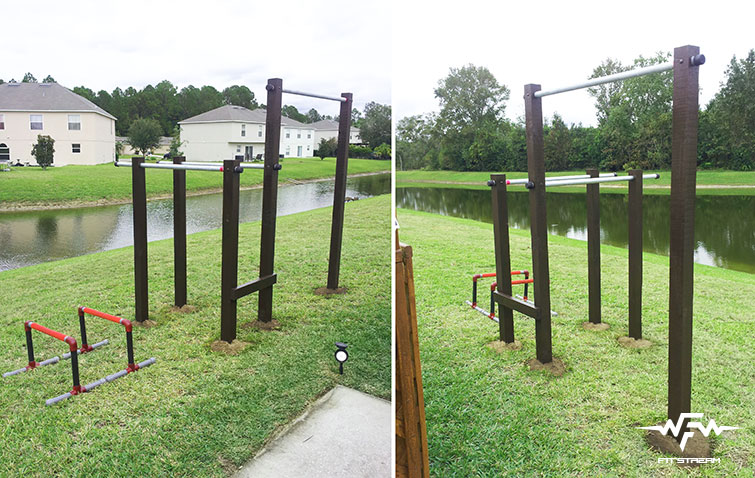
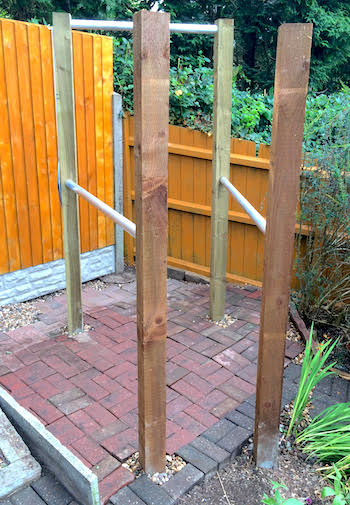
This example sent to us by Richard Young shows a combo pull-up bar and dipping station installed in his garden at home -
Next up, sent to us by Xavi and Samantha, who decided to build their own pull-up and parallel bar station in their garden for themselves and their PT clients @ Dillys.co.uk -
"We used 6 post 125x125mm (2x2.4m and 4x3m) putting them down 70cm into the garden with at least 50 to 60cm of concrete.
The bars are 2x2m and 2x 1.5m heavy duty 1.25inch galvanised threaded bars that go into flat flanges. I think we used 2 bags of 20kg of concrete in each hole J.
We are thinking to put some monkey bars in between the pull-up bars too."
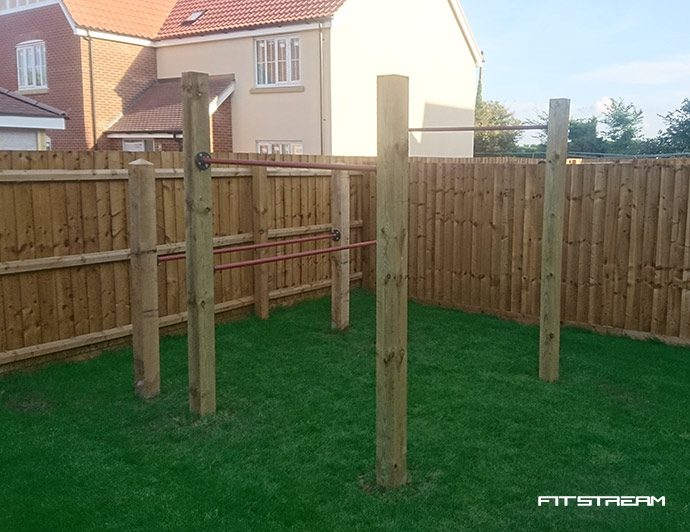
This DIY bodyweight rig was shared with us by Andrew Ballard who created a freestanding design which has two pull-up bars and a parallel bar set up in the centre.
Andrew - "Thanks for your help guys. I finally got around to building my set up. It's free standing so if I move I can take it with me. Maybe, it’s heavy as hell!".
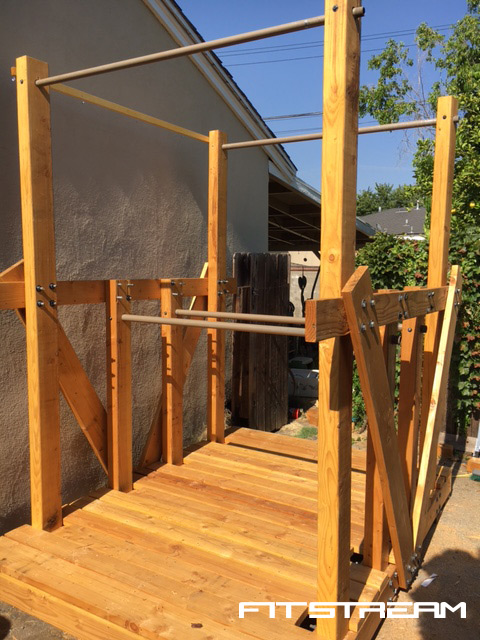
Here, we have another outdoor pull-up station, kindly shared with us by Anthony Palladino -
"The bars (except 1) are all 1" steel attached with galvanized floor flanges.
One of the two highest bars is 3/4". The two high pull up bars are 48" long and about 7'4" or so off of the ground. The other bar is about 10" lower, and it and the dip bars are 60".
The dip style bars are about 18" apart at one end and about 22" apart at the other end. We did this to give different widths for the dips.
I used all 6" x 6" x 12' pressure treated posts. None are cut, and they are over 3' in the ground, with cement.
We painted the bars blue with Rustoleum spray paint but first cleaned them with acetone and a galvanized metal spray primer.
The floor flanges are secured into the posts using 5/8" (I believe) toggle bolts. The bots are 2 1/2" to 3 1/2".
It's not going anywhere!!!! We may put on a pegboard across the section where the dips are or on the side of one of the posts vertically."
These outdoor pull-up bars were built by Natalie Terrana who shared the following with us:
"Thank you for your resources! We built this rig on Sunday. We used 4”x6x12’ posts and 3/4” galvanized steel pipe. We drilled through the 4x6 with a 1” bit to pass the bar through for added security and attached floor flanges with Loctite then secured to the 4x6 with wood screws. We dug 3’ deep holes and each hole has two 80# bags of Sakrete with a layer of pebbles between the wood and the dirt at bottom.
We're probably going to add a set of parallel bars but for now we are so proud and excited about what we have already been able to do!"
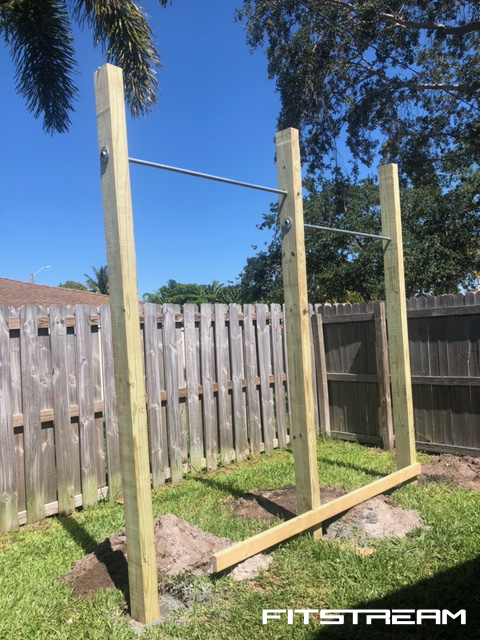
And another example of an outdoor pull-up bar combined with horizontal bars installed by Mike Westhead -
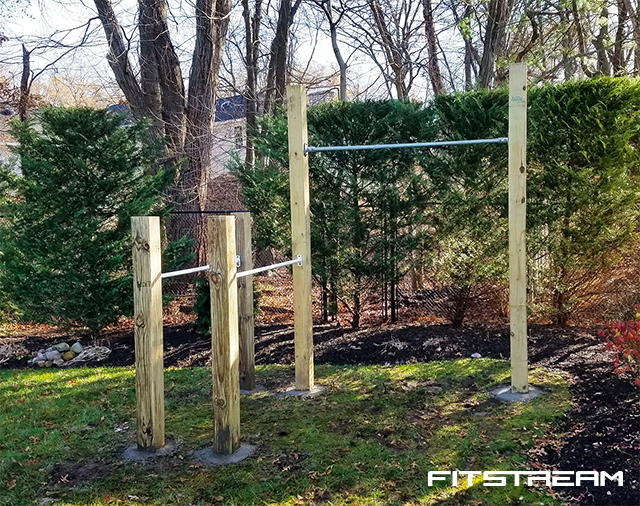
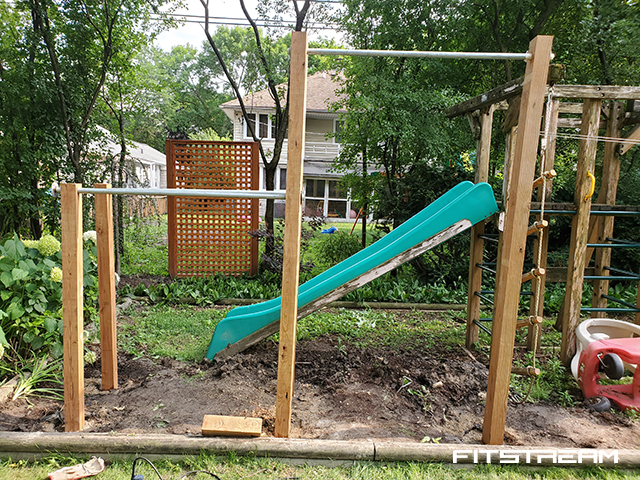
How about this setup created for his son by Bill Kanter!
"With help from some of the pictures on your site I was able to build a pull up bar and dip station. For the poles I used 1" galvanized pipe (5" wide). .The pull up bar is 4x6 treated posts and the dip bars are 4x4. All is 36" in the ground with cement. (I had home depot cut the 12' pole to 11' so its 8' above ground and the 4x4 was 8 feet so it is 5' above the ground."
Send us your own DIY bodyweight station or pull-up bar designs to [email protected] and we'll share it on our site to inspire people around the world to create their own.
![]() Build this bodyweight gym is done so at your own risk. Incorrect installation or improper training can result in serious injury!
Build this bodyweight gym is done so at your own risk. Incorrect installation or improper training can result in serious injury!

